Showing posts with label crafts. Show all posts

Monday, July 2, 2012

Blake's 2nd Birthday: An Elmo Party!

Finally, I'm getting around to posting about the big 2nd Birthday! Blake has been loving Elmo {or Melmo, as he says it} lately so I thought he would love an Elmo-ish themed party. To get some ideas I headed to {of course} pinterest. {where was pinterest when I was planning our wedding 6 years ago?!}

Invitations: I love invitations. But they can become pretty costly {and most people just throw them away} so this year I decided to try making something simple on our computer. It did help that I could look for ideas on etsy and pinterest. They were fun to create!

Goodie Bags: A while back I came across these square plain red gift bags at Target and thought they would make perfect Elmo party favor bags. To make them look like Elmo, I just cut out eyes, nose and a mouth from card stock and glued it on. {I'm not supper artistic so the one thing I loved about Elmo is he's really not that hard to create!} 

The decorations and food: The banner I made out of card stock and the frame I found at Goodwill and took the glass and print out and spray painted red and stapled ribbon to the back and and then used close pins to hold the pictures to the ribbon. The food I decided to keep simple this year. Since the party was at 3pm I didn't feel like I needed to provide a whole meal but I wanted something {because what's a party without food?!} so we just had veggies with ranch, fruit with {fruit dip}, crackers with a cheese spread and chips and salsa.
The Elmo: Isn't that the most awesome Elmo balloon you've ever seen?! It was huge! And Blake was terrified of it...
This is the closest he'd get to it and he was trying to claw his way out of my arms. It was probably a good thing he wasn't with me when I picked it up from the store or he might not have gotten in the car with it ha! Someone put Elmo in time out...
I'm glad Luke loved Elmo!

The cake: {just to warn you, this is a bit of a long story...} I ordered the cake from Market of Choice. Market of Choice is newer local grocery store in Corvallis that makes the most delicious cake ever. {I am serious, if you are ever near a Market of Choice stop and buy a slice of cake, you won't be disappointed.} 
When I called to talk to the cake decorator about what I wanted for an Elmo cake I was shocked when she told me that they couldn't draw Elmo's face on a cake because of copy right issues. All I was originally planning on was a square cake with Elmo's face on it. Pretty easy. So when I was told they couldn't do that I was at a loss. What was suppose to make my life easier {buying a cake, not making one} was now turning into a hassle! I called all over the place and searched every online website for something Elmo to put on a cake but nothing I found I really liked. The next idea was to have them just frost it and me add Elmo face myself to it but I am not talented when it comes to cake decorating and really didn't want to take on that job, ha! So we went for an Elmo inspired cake. The frosting on the cake is suppose to look like Elmo's fur and I made the little Elmo face topper out of card stock and also made the cupcake toppers. The says "Love, Melmo" because that is the way Blake says Elmo :)
After all that hassle, I think we ended up with a pretty fun unique cake! Which was supper delicious too!

Now on to the party pictures!!
 We were so lucky that it didn't rain! 
You never know what the weather is going to do in Oregon.


 The 
 Birthday 
Boy!

 Blowing out the candle
FaceTime with cousin T {who lives in Virginia}
 Opening presents... 
 He had a way better idea of what to do this year then he did last year!

The only minor problem was that he wanted to play with all of them as soon as he opened them :)

We had a great time celebrating with lots of family and friends! Thank you to everyone who came! It was a great day and I can believe our little boy is 2!

Sunday, March 25, 2012

Valentines Day! {I realize Valentines Day was over a month ago}

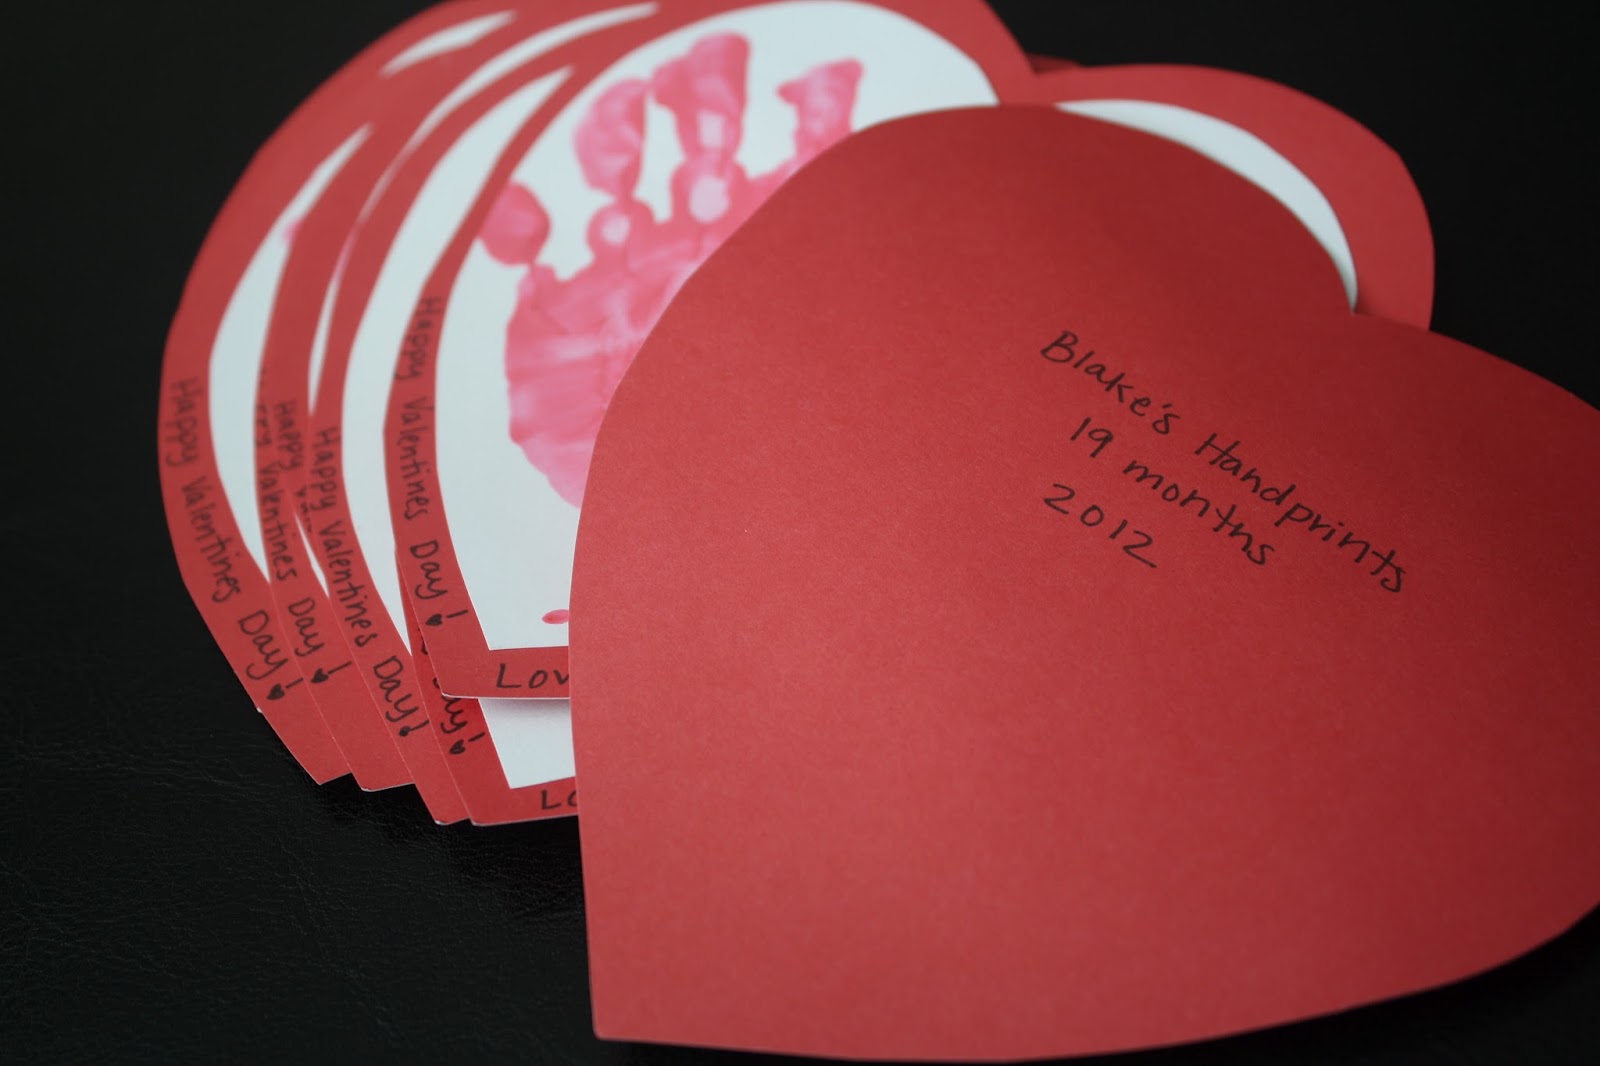
So I know this is supper extremely late, but remember this post awhile back, well I had intentions of sharing with you what Blake was working on in those pictures but some how Valentines Day came and went and I never got around to sharing what he made! {I think it was the sickness that hit our house combined with leaving for Virginia all right around Valentines Day that caused the lack of a Valentines Day post}
He made handprint hearts! It was a fun activity to do with him! However, now he thinks that he can color his hand with marker to make a handprint.
 We sent them out to his grandmas and grandpas, great-grandmas and great-grandpas, aunt, and cousins and a few little friends. It was supper easy, although I only did a few handprints at a time so I gave myself lots of time to complete them and get them in the mail before Valentines Day. 
I think they all enjoyed getting some little handprints in the mail!
Now, if you like to plan ahead you have an idea for next year!

Wednesday, July 13, 2011

Homemade Birthday Banner


It seems like banners are the thing these days. I thought it would be fun to make a banner that could be our "family birthday banner" to hang for every birthday, every year as a family tradition.

Here's how I made it...

Materials:
1/4 yard fabric for letters
1/4 yard each of 3-4 different fabrics (amount depends on size of triangles)
Interfacing
Heat and Bond iron on adhesive
Double fold bias tape
Thread to match

1. Make a pattern. I just used my computer to print a template. I played around with different size triangles and fonts till I found what I liked. For the font I used the outline of the letter to save ink.
{Triangles....}
2. Cut out triangles

3. Then sew edges (I only did the sides, not the top)
4. Cut edges with pinking scissors to help with fraying

{Now for the letters...}
5. Iron interfacing on to fabric for letters
6. Cut letters out of fabric with interfacing (make sure to cut them out so they read the right way)
7. Place letters on triangles
 8. Attach the letters to the triangle with Heat and Bond (measure the top of the triangle to the top to the letter so all the letters end up at the same height)
9. Hand stitch or sew the edge of the letters on to the triangle (I hand stitched them)
10. After all letters are on the triangles, lay them out (I used the floor since my table wasn't big enough) and pin the bias tape to them (sorry I didn't get any pictures of this, kind of hard to explain!) 
11. Then sew or hand stitch the bias tape to the top of the triangles
12. Find somewhere to hang and enjoy!

Monday, August 9, 2010

2 Months!

As you can probably tell I did not get around to making onesies before he hit 2 months old... you can read about what I was going to do here. For now I think I am just going to continue to cut out the numbers and lay them on the onesies. I have decided to do this for two reasons: time and money. I can't seem to find the time to sew :( and I figure then this way I will always be able to use the onesies more then I would with the number on it. I really would like to sew them and have a set so maybe some day I will get around to it. I always thought it would be fun to try to sell something like this on etsy. Maybe someday.
He is such a good baby!
Some stats:
The blue eyes are sticking around :) 
Not sure what he weighs currently. I am guessing he is closing in on 10lbs
Nicknames: Buba, Big Guy, Blakers, Little Man
Favorite activities: making bubbles, bath time and cooing
Sleeps about a 6 hour stretch at night!
Has now traveled to Medford 3 times! And is a trooper in the car!
Gets to meet Aunt Michelle, Uncle Carlos and Cousin Tristan this month!

LinkWithin

Related Posts with Thumbnails
Related Posts Plugin for WordPress, Blogger...